
FAQ
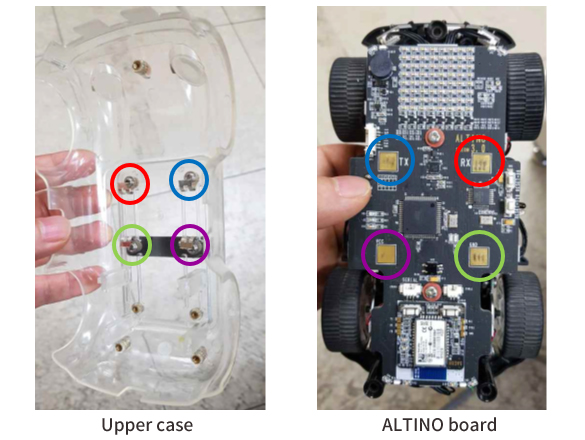
1.The clip on the round part of the upper case must touch the board. (The same color of the clip and board must be touching for connection.)
2.
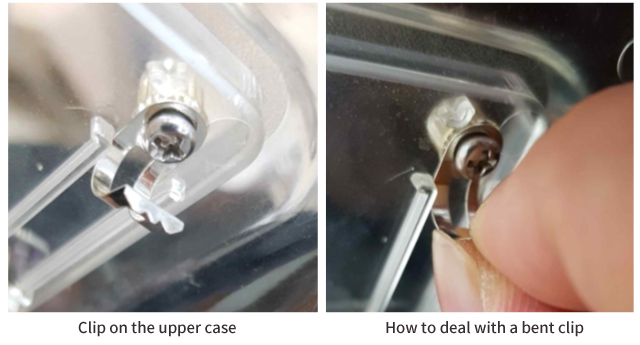
This is the clip of the upper case of ALTINO.
If the clip is too bent, it will not touch the board, which may hinder charging. Unbend the clip gently.
�� When ALTINO is connected to the charger, the charger must be plugged into an electrical outlet. Otherwise, the current flows from the ALTINO battery to the charger and the battery may discharge.
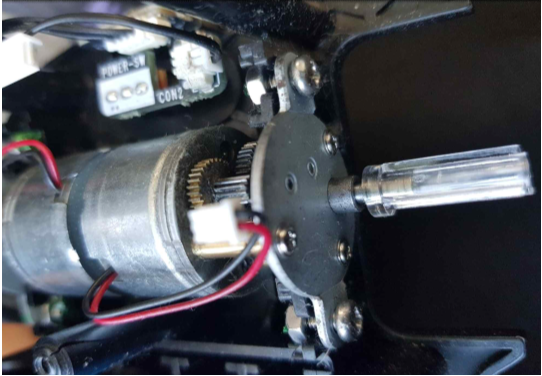
1. Remove the (4) circled bolts using a screwdriver.
The nuts may fall when you remove the bolts. Be careful not to lose the nuts.
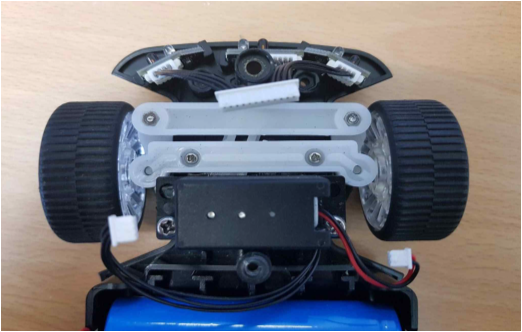
2. Disassemble in the order of wheels, connection part (white plastic), and motor.
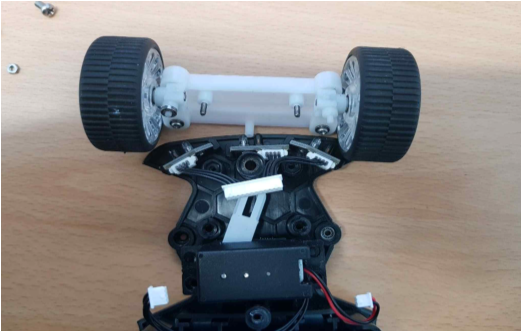
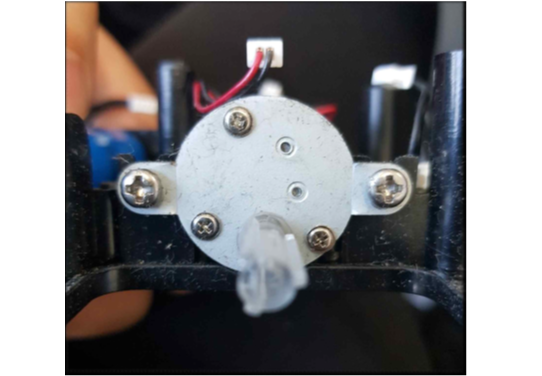
3. This is what a disassembled steering motor looks like.

4. Follow the steps backwards to reassemble.
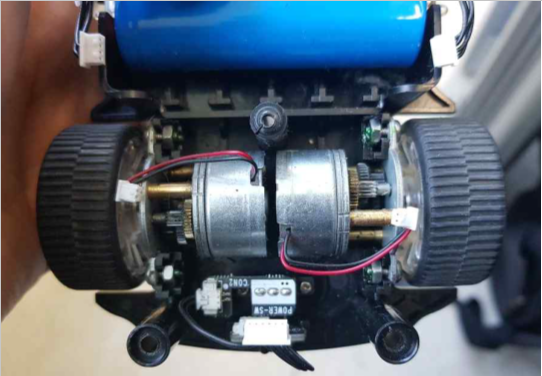
1. You can find the ALTINO rear-wheel motor after completing Basic Disassembly of ALTINO.
Pull the wheels out gently to disassemble.
2. Remove the bolts connected to the nuts using a screwdriver.
(You don��t have to remove all the bolts.)
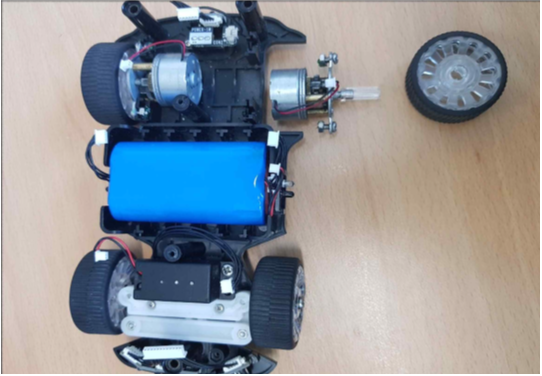
3. After removing the bolts, lift the motor.
4. This is what a disassembled rear-wheel motor looks like.
5. Follow the steps backwards to reassemble
�� Remember that the line of the motor must face upward during assembly.
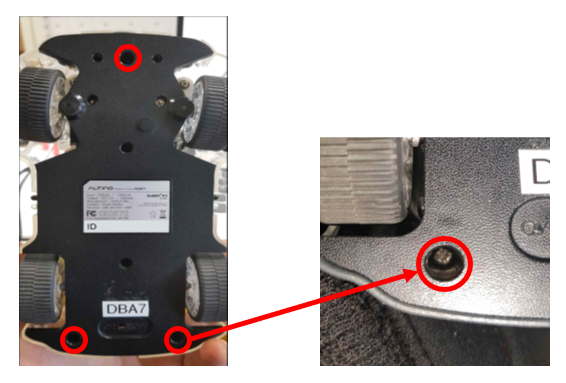
1. Remove the 3 screws at the bottom of ALTINO that are circled in red to remove the upper case.
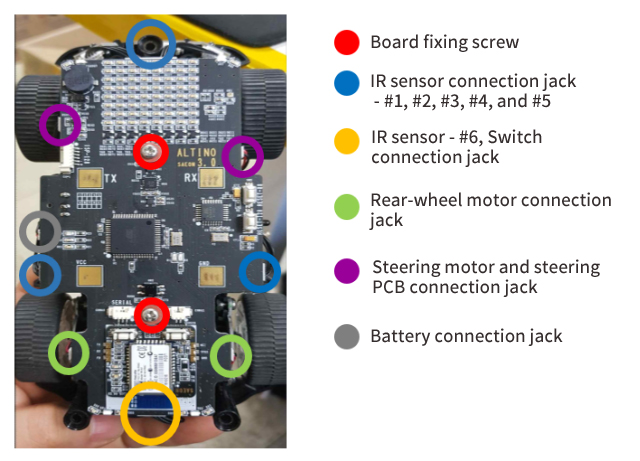
2. After removing the upper case, remove the 2 marked screws and 9 jacks.
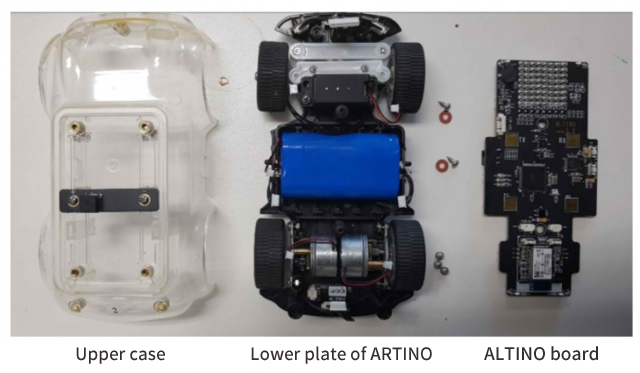
3. Once you disassemble ALTINO, you will see 1 upper case, 1 lower plate, 1 ALTINO board, 2 washers, 2 board fixing screws, 1 upper case, and 3 fixing screws, as shown in the photo below.
If you complete Steps 1-3, you have completed the basic disassembly of ALTINO for hardware problem solving.
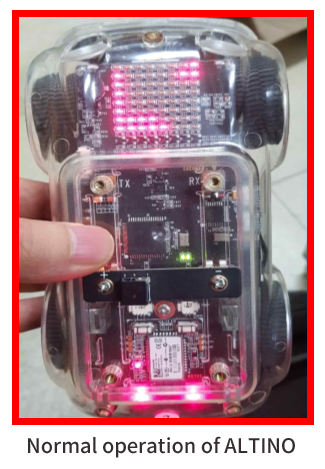
It is normal that you see ALTINO3.0 or ALTINO4.0 on the dot matrix when you turn ALTINO on.
If the dot matrix does not display ALTINO3.0 or ALTINO4.0 or only one line is shown after you turn ALTINO on and hear a buzzing noise, you should initialize ALTINO and download firmware.
If you can��t select or control the IR sensor even when you enter ALTINO Menu, you should initialize ALTINO and download firmware. Then, try again.
If the IR sensor��s values are too small or too large, check to see whether it is situated in a normal location.

| 1 |